Mastering Anchor Points in After Effects with Expression Controls
Adobe After Effects is a powerful tool for motion graphics and visual effects. One of its many strengths is the ability to control layer properties with expressions. In this post, we’ll explore an anchor point expression that leverages a Dropdown Menu Expression Control to dynamically set the anchor point to one of nine specific positions (corners and centers). We’ll also provide guidelines on how to integrate it into your projects.
What Is an Anchor Point in After Effects?
The anchor point determines the center of rotation and scaling for a layer. By default, this is usually centered in the layer. However, there are times you may want to quickly change the anchor point — whether it be to one of the corners, the center, or one of the edge midpoints — without manually adjusting it every time. This is where expressions come in handy.
The Expression Explained
The expression we’ll look at uses the following components:
- Dropdown Menu Expression Control:
You add a Dropdown Menu Expression Control to your layer and rename it “Corner”. In the menu, you define nine options corresponding to:
- Top Left
- Top Center
- Top Right
- Middle Left
- Center
- Middle Right
- Bottom Left
- Bottom Center
- Bottom Right
- sourceRectAtTime:
This function calculates the layer’s content bounds (i.e., the bounding box of the layer’s content). By returning properties such as the left, top, width, and height, we can determine where each corner is located. - Conditional Checks:
The expression checks the value selected in the dropdown and sets the anchor point accordingly. For example, if “Top Left” is selected, the anchor point is set to the top-left corner of the content bounds.
Below is the complete expression written in JavaScript:
// Add a Dropdown Menu Expression Control to your layer and rename it "Corner".
// Configure the dropdown options as follows for nine positions:
//   1: Top Left
//   2: Top Center
//   3: Top Right
//   4: Middle Left
//   5: Center
//   6: Middle Right
//   7: Bottom Left
//   8: Bottom Center
//   9: Bottom Right

var corner = effect("Corner")("Menu");
var r = thisLayer.sourceRectAtTime(time, true);
var left = r.left;
var top = r.top;
var w = r.width;
var h = r.height;

if (corner == 1) {
  // Top Left
  [left, top];
} else if (corner == 2) {
  // Top Center
  [left + w/2, top];
} else if (corner == 3) {
  // Top Right
  [left + w, top];
} else if (corner == 4) {
  // Middle Left
  [left, top + h/2];
} else if (corner == 5) {
  // Center
  [left + w/2, top + h/2];
} else if (corner == 6) {
  // Middle Right
  [left + w, top + h/2];
} else if (corner == 7) {
  // Bottom Left
  [left, top + h];
} else if (corner == 8) {
  // Bottom Center
  [left + w/2, top + h];
} else if (corner == 9) {
  // Bottom Right
  [left + w, top + h];
} else {
  // Default to Top Left
  [left, top];
}Step-by-Step Setup Guideline
Follow these steps to integrate the expression into your project:
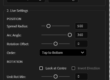
- Create a New Composition:
Open After Effects and create a new composition with your desired settings and layers. - Add a Layer:
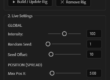
Add or select a layer where you want to change the anchor point dynamically. - Add the Dropdown Menu Control:
- Go to Effect > Expression Controls > Dropdown Menu Control.
- Rename the control to “Corner”.
- Configure the dropdown menu options (in order):
- Top Left
- Top Center
- Top Right
- Middle Left
- Center
- Middle Right
- Bottom Left
- Bottom Center
- Bottom Right
- Apply the Expression:
- Select the Anchor Point property of your layer.
- Alt/Option-click the stopwatch to enable expressions.
- Paste the above code into the expression text field.
- Test the Expression:
- Use the Dropdown Menu Control to select different positions.
- The anchor point of your layer should update according to your selection, allowing for flexible and dynamic adjustments.
Why Use Custom Expressions?
- Efficiency: Quickly reposition anchor points without repeatedly entering manual values.
- Dynamic Control: Change the focal point of scale, rotation, and other animations at any time with a simple dropdown.
- Reusable Snippet: This expression can be applied to multiple layers and projects, saving time and reducing errors.
Final Thoughts
By incorporating this expression into your workflow, you can gain much greater control over your layer’s transformation properties. This guide should help you understand how the code works and how to deploy it in your projects.
Happy animating!
For additional tips and advanced expression techniques, stay tuned for more posts on our blog.