Redshift OSL Shaders: Unleashing Procedural Power in Rendering
Redshift, Maxon’s powerful GPU-accelerated renderer, offers artists advanced flexibility and creative potential. One of its most exciting features is support for OSL (Open Shading Language) Shaders. This capability opens the door to procedural texturing, custom surface effects, and non-destructive material workflows that were once only possible in high-end production pipelines.
In this article, we’ll explore what Redshift OSL Shaders are, how they work, key features from the official Maxon documentation, and showcase excellent examples from the @Maxon-Computer/Redshift-OSL-Shaders GitHub repository.
What is OSL?
Open Shading Language (OSL) is an open-source shading language developed by Sony Pictures Imageworks. It’s designed for advanced, physically-based rendering and is supported by numerous industry-standard render engines. OSL shaders are small programs written to describe surface, displacement, or volume properties in a renderer-agnostic way.
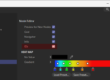
Redshift OSL Shader Node Overview
Redshift provides a dedicated OSL Shader node, which lets you import and run OSL scripts directly in your Redshift material networks. This means you can:
- Write or import OSL code to generate procedural textures and effects
- Use existing OSL libraries and snippets from the community
- Share custom shaders between different DCC apps (Cinema 4D, Blender, Maya, etc.) that support OSL
Key Features:
- Custom Procedural Textures: Create patterns, noises, gradients, and surface effects procedurally.
- Advanced Utility: Build math, logic, or utility nodes to drive complex material setups.
- Cross-Platform: OSL scripts can be reused in any renderer or application supporting OSL.
- Parameter Exposure: Easily expose shader parameters for artist control in the UI.
How to Use OSL Shaders in Redshift
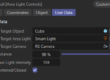
- Add an OSL Shader Node:
In Redshift’s node editor, add an OSL Shader node to your material network. - Load or Paste OSL Code:
Either load a.oslfile from disk or paste your OSL code directly into the node. - Compile and Edit Parameters:
The node will compile the shader and expose its parameters for control. - Connect to Material Network:
Use the output(s) from the OSL node to drive color, bump, displacement, or any other input in your Redshift materials.
Example OSL Shaders from @Maxon-Computer/Redshift-OSL-Shaders
The @Maxon-Computer/Redshift-OSL-Shaders repository is a treasure trove of ready-to-use and educational OSL shaders. Here are some highlights:
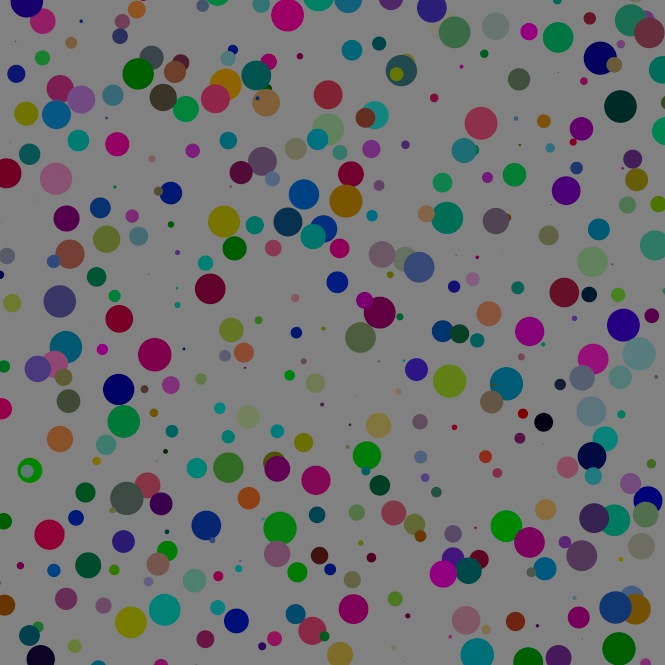
1. Procedural Noise and Patterns
- Voronoi, Perlin, and Cellular Noise: Generate organic textures for surfaces without bitmaps.
- Tile and Grid Generators: Create brick, tile, or checkerboard patterns with full procedural control.
2. Utility and Math Shaders
- Remapping Ranges: Convert values between different ranges, useful for controlling other shader parameters.
- Color Correction and Mixing: Apply procedural color grading, blending, or randomization.
3. UV and Mapping Tools
- Triplanar Mapping: Project textures without visible seams.
- UV Distortion: Create wavy, warped, or glitched UV effects, all procedurally.
4. Surface Effects
- Edge Detection: Procedurally highlight edges for stylized looks or masking.
- Curvature and Ambient Occlusion: Generate curvature or AO effects without pre-baked maps.
Each shader is documented with example renders and parameter explanations in the repository’s README files, making it easy to learn and adapt for your own projects.
Why Use OSL in Redshift?
- Ultimate Flexibility: Procedural shaders can replace or augment bitmap textures, saving memory and enabling infinite variation.
- Non-Destructive Workflow: Easily tweak parameters or entire shader logic without re-baking or re-painting textures.
- Portability: Share and reuse shaders across projects, teams, and even different 3D software.
- Community Power: Tap into a global pool of OSL scripts, or contribute your own for others to use.
Getting Started Tips
- Start Simple: Try loading basic OSL shaders from the GitHub repo to see how they work.
- Tweak Parameters: Experiment with exposed controls to understand their effect.
- Read the Docs: The official Maxon documentation gives detailed info on node settings and limitations.
- Write Your Own: If you’re comfortable with code, start customizing or writing your own OSL scripts for unique effects.
Conclusion
The Redshift OSL Shader node is a game-changer for procedural and technical artists, allowing for unmatched control and creativity in material creation. With resources like the official documentation and the open-source GitHub repository from Maxon-Computer, there’s never been a better time to dive into OSL and supercharge your Redshift workflow.
Try out some OSL shaders today and unlock a new dimension of procedural rendering in Redshift!
Here some experiments I did (Feel free to download Cinema 4D Project File)
shader PulsingCinema4DRedshiftOSLShader(
    float CycleTime = 1, // Time in seconds for a complete cycle
    float Intensity = 1,
    float FPS = 24, // The frames per second of your animation
    int Frame = 1, // This will be animated to match the current frame
    color BaseColor = color(0.8, 0.0, 0.0),
    float BaseOpacity = 1.0,
    output color Diffuse = 0,
    output color Emission = 0,
    output float Opacity = 0
)
{
    float pi = 3.14159265359;
    float two_pi = 2.0 * pi; // 2 * pi

    // Convert frame number to time in seconds
    float current_time = Frame / FPS;

    // Calculate the number of cycles completed by the current time
    float cycles = current_time / CycleTime;

    // Calculate pulsing factor using modulo operation to create a repeating cycle
    float pulsing_factor = 0.5 * (cos(fmod(cycles, 1.0) * two_pi) + 1) * Intensity;

    // Diffuse is the color that reacts with light in a Lambertian manner
    Diffuse = BaseColor * pulsing_factor;

    // Emission is the color that the surface emits without any external light
    Emission = BaseColor * pulsing_factor;

    // Opacity is the transparency of the material (1.0 opaque, 0.0 fully transparent)
    Opacity = BaseOpacity * pulsing_factor;
}